Typical Event Flow
For most events, you start on the setup tab of the Tab Panel and create or load the event.
Next, you switch to the Operate tab where you print proofs and launch the monitor preview, as needed.
The various panels on this tab can be opened or closed by clicking on the blue bar. Typically, the panels necessary for the current job settings will automatically be opened.
Everything is laid out in the order you'll use it and panels can be closed when you finish with that section.
Hovering over any control in the Tab Panel will display a ToolTip with specific info about that control.
In general, you'll follow this procedure once the event starts:
Welcome the next guest and ask for their background choice.
Pose the guest and take their photo.
Change the size/postion/effects/etc. of the image in SolidKey until it looks good in the chosen background.
-
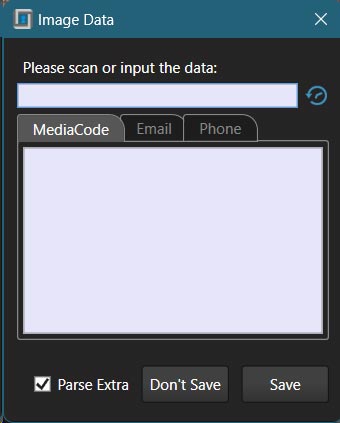
Press F1 to save the composite and print and/or collect the necessary data.
You can type or scan whatever data into the save box and it should properly categorize it as email/phone/etc.
Clicking the blue history icon will show you the past several bits of data that you used for quickly reusing them.
Put the prints, if any, into folders and present them to the guest.
Repeat.
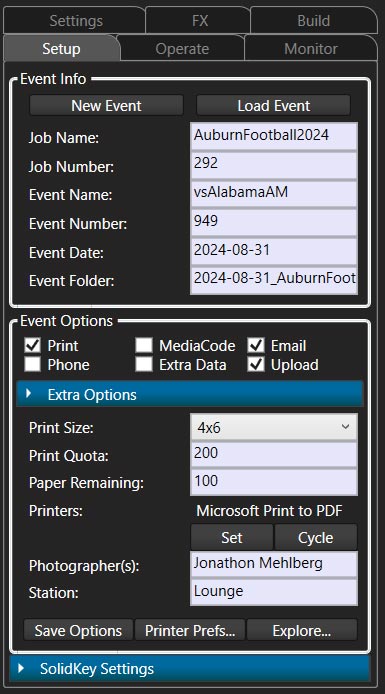
Event Setup
Before beginning any event, the first step is to either create a new event, or load an existing event. SolidKey automatically loads the last used event and displays event details on the Setup tab of the Tab panel.
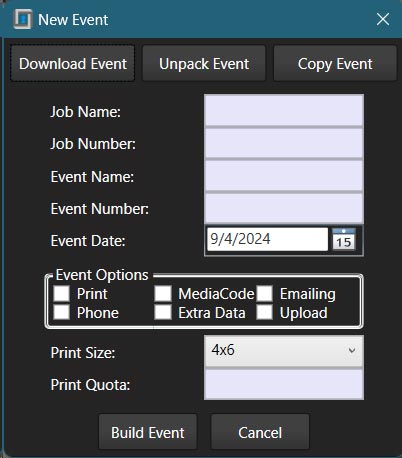
Create New Event:
Click the New Event button.
-
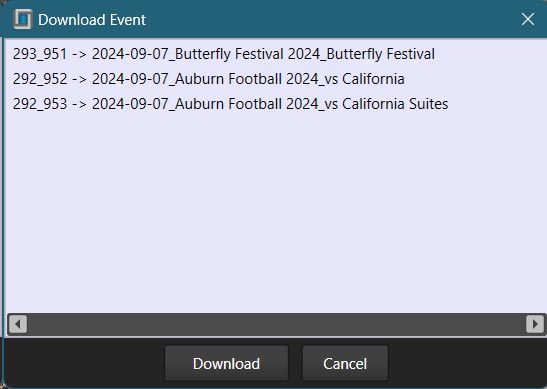
To load an event from the server, PortalKey, click Download Event and select the desired event.
To unpack a .event file, click Unpack Event and choose the desired file from the Windows file picker.
To manually create an event, fill out the necessary details and click Build Event.
-
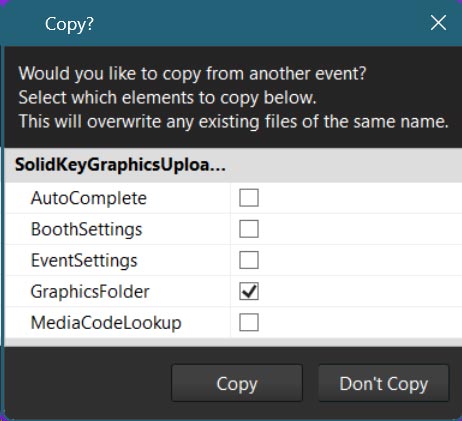
Copy event is a bit of a special case. When you click, it will have you choose an event to download and then select which elements to copy from an existing event that's on the local computer.
Load Existing Event:
-
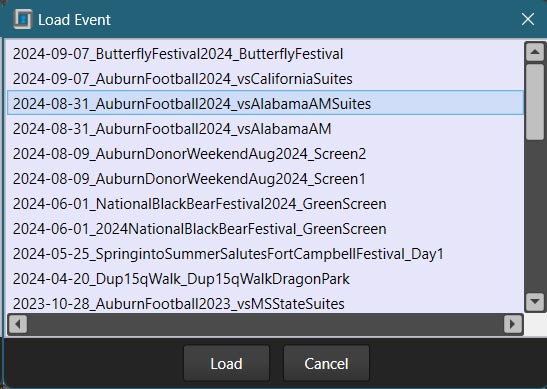
Click Load Event and select your desired event from the list. This only loads events that exist on the local computer in the Events folder.
-
If you'd like to load an existing event that isn't in the Events folder, you can choose File->Load External Event...
This is useful if you need to upload photos, or to reference something, from your backup device.
-Important Note-
Before beginning to take photos, always double check that all of the information in the Setup tab is correct.
The Printer
Initial Hardware Setup:
-
Unpack the printer and place it on the table making sure you plug it in to power and the computer.
-
Turn it on with the rocker switch on the bottom right corner of the printer's front.
-
Next, pull up on the blue handle along the center of bottom edge to the left of the power button and slide the media drawer forward.
-
Insert the ink in the top slide out tray making sure you follow the diagram.
-
Pull the blue paper release lever on the left side of the drawer and lift the top up.
-
Remove the scrap bin. Always make sure this is emptied.
-
Remove the packing core and paper holder.
-
Replace the core with the roll of paper making sure to use spacers if necessary.
-
Put the paper with holders back in the drawer and gently roll the paper out into the printer until you hear a beep. Don't force this. If there is resistance, make sure the paper is feeding properly.
-
Close everything up making sure you replace the scap bin and wait for the printer to align everything.
-
If you need more information, check out the DNP DS40 & DS80 Manual.
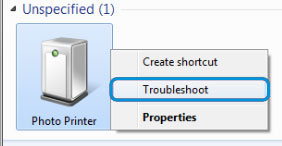
Initial Software Setup:
-
If the printer is loaded and on prior to starting SolidKey, it should normally be automatically selected.
-
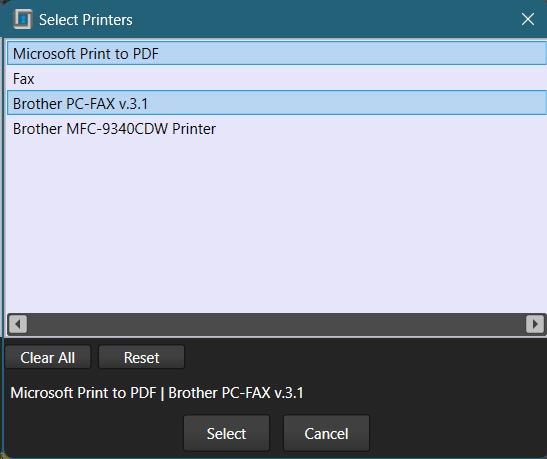
If not, you can click the set button next to printers in the setup tab.
Here you can select multiple printers by clicking on them and see the list at the bottom of the window.
Clear all does just that and Reset attempts to guess the preferred printer setup.
Typically, you just want one printer selected, and it is usually a DS40.
Printer Settings:
There are a few very important things to check in the printer settings.
-
First, click the Tools->Printing Preferences... menu item or the Printer Prefs... button in the setup tab.
-
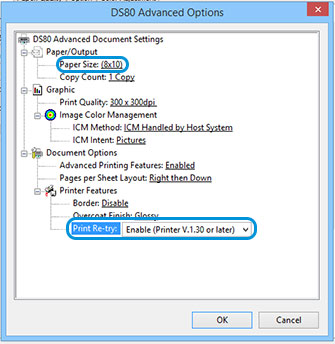
From there, click the "Advanced" button to display a screen similar to this:
-
Ensure that the first circled item, Paper Size, is set to the correct size for your event. The second circled item, Print Re-try, should always be set to Enable.
Operation:
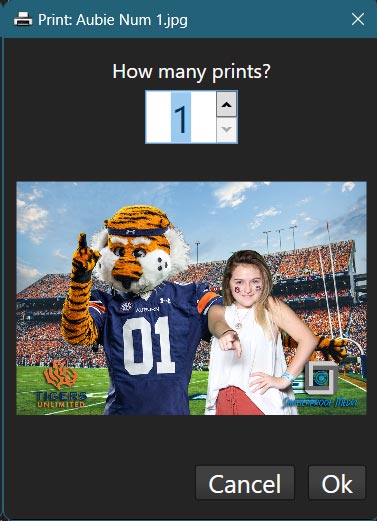
When you save a composite, the print window will appear.
Simply choose the number of prints and click ok, or press the alt key.
The Monitor
Initial Setup:
If a monitor is attached and on before SolidKey is launched, it should automatically be set up.
If you wish to show the background choices on the monitor, right click the preview on the Monitor tab and choose Show Proofs or use the Command Palette
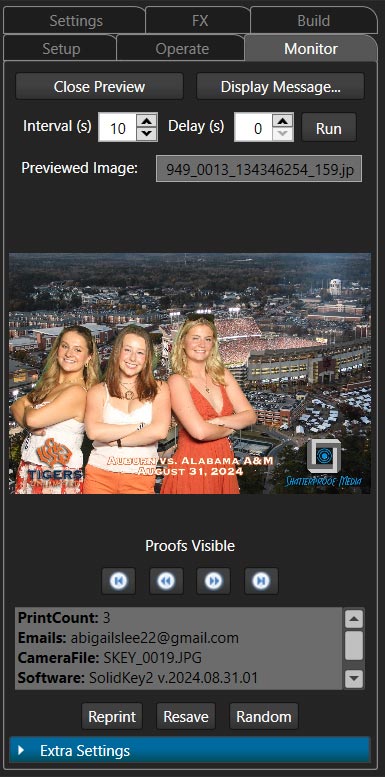
Monitor Tab:
This tab provides a variety of useful image preview functions.
If a monitor is attached, Launch Preview will display the preview on the monitor. Otherwise, it will open a preview window on the main monitor.
Double clicking within the preview will toggle visibility of the title bar for access to the maximize/restore, minimize, and close buttons.
When not maximized, the preview can be dragged from anywhere within the window and can be manually resized.
Whenever the preview window, or the monitor tab, is focused (by clicking on it) the arrow keys cycle through the images.
The Monitor tab also contains functions for reprinting/re-saving images as well as controls to run a slideshow.
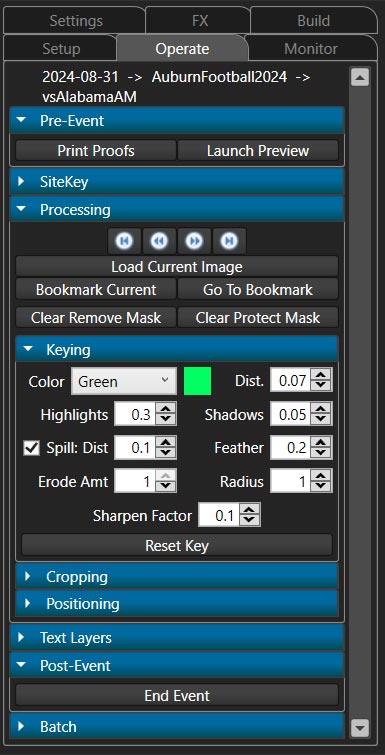
Processing and Keying
SolidKey should handle most keying tasks automatically. Sometimes, however, there is a situation that needs some manual help.
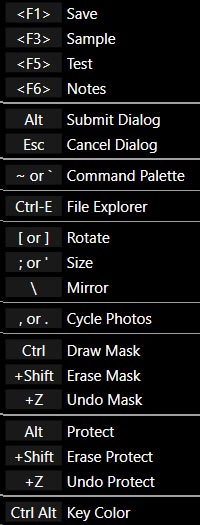
If there is a shadow or object that doesn't key out, you can paint it out by Ctrl-Dragging a selection around it. If you need to erase a part of your selection, you can Ctrl-Shift-Drag a selection around the area to undo that section while Ctrl-Z will undo the whole last change.
Similarly, if there is something important that gets keyed out, like someone's shirt, you can paint it in with Alt-Drag and undo a section with Alt-Shift-Drag or the whole change with Alt-Z.
You can save and load key settings from the File->Tools->Key menu or with Ctrl-S and Ctrl-L.
-
For details about the other tools, hover over a specific tool or go to Operate Tab.
Special Layers
There are several different types of layers in SolidKey.
Image Layers - The most common and straightforward layer. They hold images and can optionally be keyed.
Text Layers - Hold text and can include variables that are filled upon saving the composite.
Multi Layers - Hold multiple images that can cycle within the same graphic. Typically used with graphics where only one element changes. E.g. celebrities in a car.
Mask Layers - Special layers with transparency that get's applied to the layer underneath.
There are also layer frames, which aren't layers, but are basically groups for layers that can be turned on and off in sequence, which is useful for animations.
Uploading
You can launch the uploader from the Tools menu or by clicking on the uploader arrow in the top right of the main window.
In the uploader window, the light bulb has three states. Grey means the uploader is off. Blue means the uploader is functioning normally. Red means the internet connection has been lost.
On the Status tab, you can view any errors that uploader is encountering. Unless the errors are due to a bad internet connection, please report them to Operations ASAP.
The FTP tab shows FTP logs, if Uploader is using FTP. FTP is only used for special cases.
You should only change settings on the Settings tab if directed to by Operations.
Important Note- Always double check that all files have uploaded for any uploading events. If any files fail to upload on site, you must upload them ASAP before storing or returning equipment.
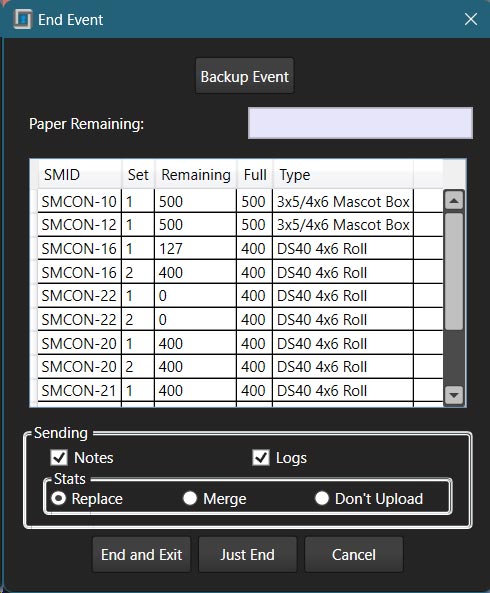
Event Close Out
At the end of every event, you need to back it up and close it out, which sends Operations a report and properly updates stats on the server.
To do this, click the End Event button on the operate tab.
-
Use the Backup button to copy all of the event files to a thumb drive, or someplace else that you will keep separate from the system computer. You can continue with other close out functions while the backup is happening.
You can either Copy or Pack the event. Packing just zips the whole event into a single file while copying makes a copy of the event folder and all files. Typically copying is faster, so is preferred unless you need to send or upload the backup somewhere.
-
Beyond backing up, ending an event requires internet. If you don't have an on site connection, notify Operations for further instructions.
-
The next section of the window shows SolidKey's best guess of how many prints are left in the printer as well as a list of all the consumables assigned to the event.
Either update the remaining values in this list, or use PortalKey to update them. If you used media that isn't listed, try scanning the QR code on the media box with your phone and update there. This helps Operations keep track any dwindling supplies.
In most cases, the rest of the settings should be left as they are.
End and Exit will send the report and close SolidKey while Just End will send the report but keep SolidKey open.
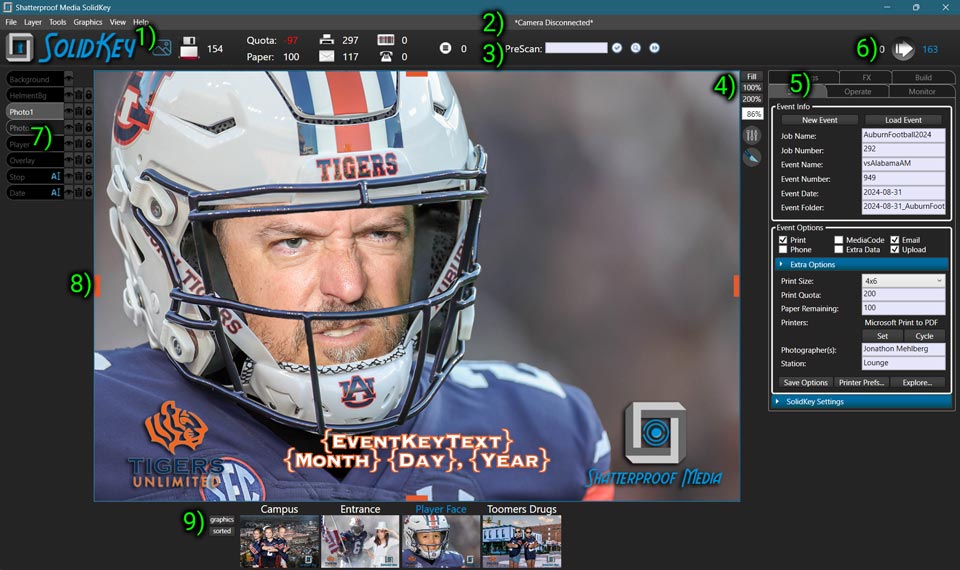
Setup
Here you will load/build events and set event settings. Most settings will be automatically set when downloading an event.
Operate
You will spend most of your time in this tab. This is where you can adjust the keying, cropping, and positioning of images.
Monitor
This is where you launch and control the preview monitor.
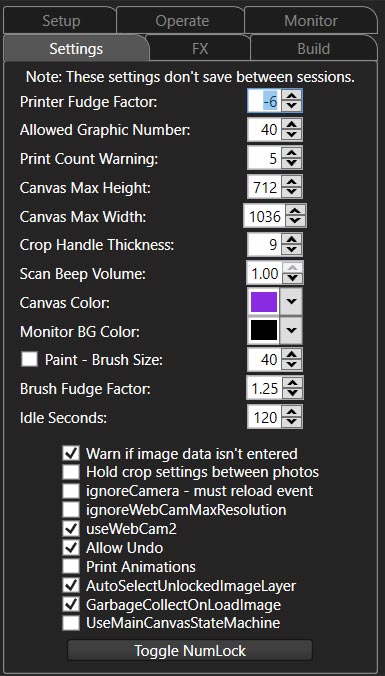
Settings
Here you find a collection of temporary settings for SolidKey. You usually won't need to change any of these unless weird things are happening.
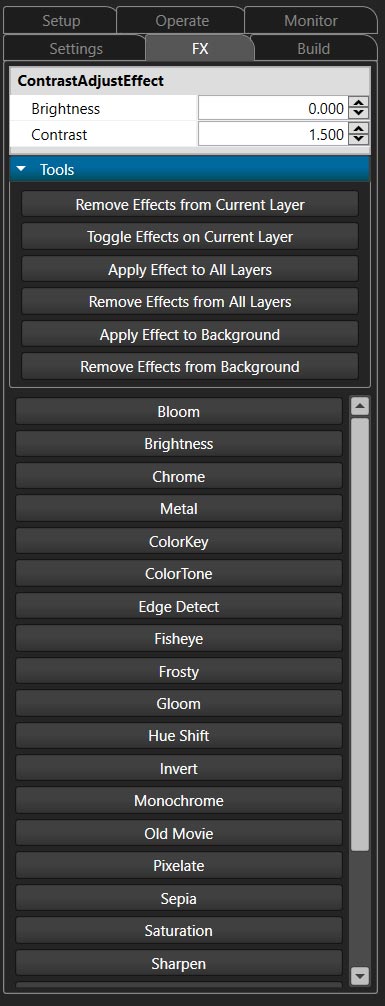
Effects
This is where you can add and edit special image effects like sepia, brightness, and contrast.
Many of them are still somewhat under development, but they can add fun elements to an image.
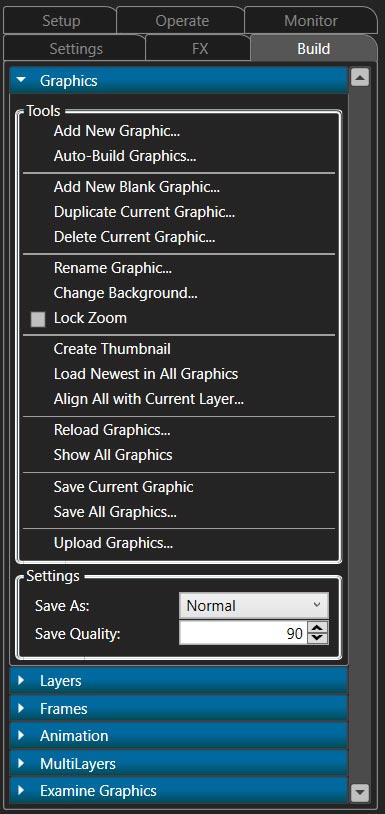
Build
This collection of tools makes building graphics in SolidKey easier and are seldom used during an event.
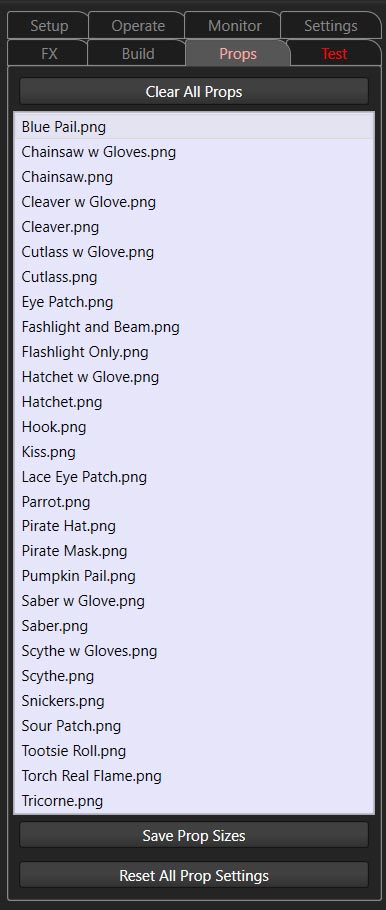
Props
If the event is set to use digital props, they can be found here. Operations will provide more information if this is the case.
Double clicking a prop will add it to the scene as a new image layer.
Clicking the Clear All Props button will remove all prop layers from the scene.
Clicking Save Prop Sizes, will have each prop remember its size even after it's removed.
Clicking Reset All Prop Settings will restore all the stored sizes to their original settings.
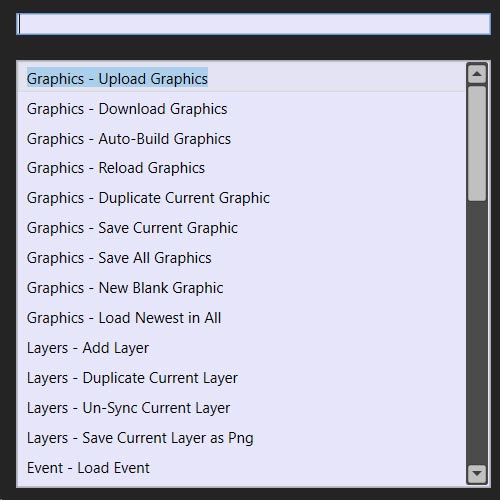
Command Palette
The Command Palette is a search box that can be used to find commands and settings. It is a great way to find commands quickly without searching through menus.
Press the shortcut, ` or ~, and start typing what you want to find.
Use arrow keys up and down to cycle through the list.
Hit enter to select the highlighted item.
Most functions available in the palette can be searched for in multiple ways. For example, End Event can be found by typing "end", "event", "send", "recap", etc.
If you can't find something, let Operations know so we can add it since only the most commonly used functions appear here.
SiteKey Setup
If the event needs on site registration or other SiteKey functions, you can view and change the settings on the Operate Tab.
Always double check that the Activity and HostIP values are properly set.
Launch Host will setup the computer as the SiteKey host for the current job. This launches the host application and sends the ip address to the server for the client computers to retrieve.
Launch Client is simply a shortcut to launch the client application.

 1
2
3
4
5
6
7
8
9
1
2
3
4
5
6
7
8
9